5 Ways to Level Up My Tasks In Asana
When you first dive into Asana, your "My Tasks" area likely defaults to a basic setup with section headers like To Do, Doing, and Done. While this layout is functional, there are powerful ways to personalize and optimize it to suit your unique workflow. Here’s a guide to refining your “My Tasks” view to bring clarity, prioritize tasks, and save time.
Step 1: Gain Context with Default Options
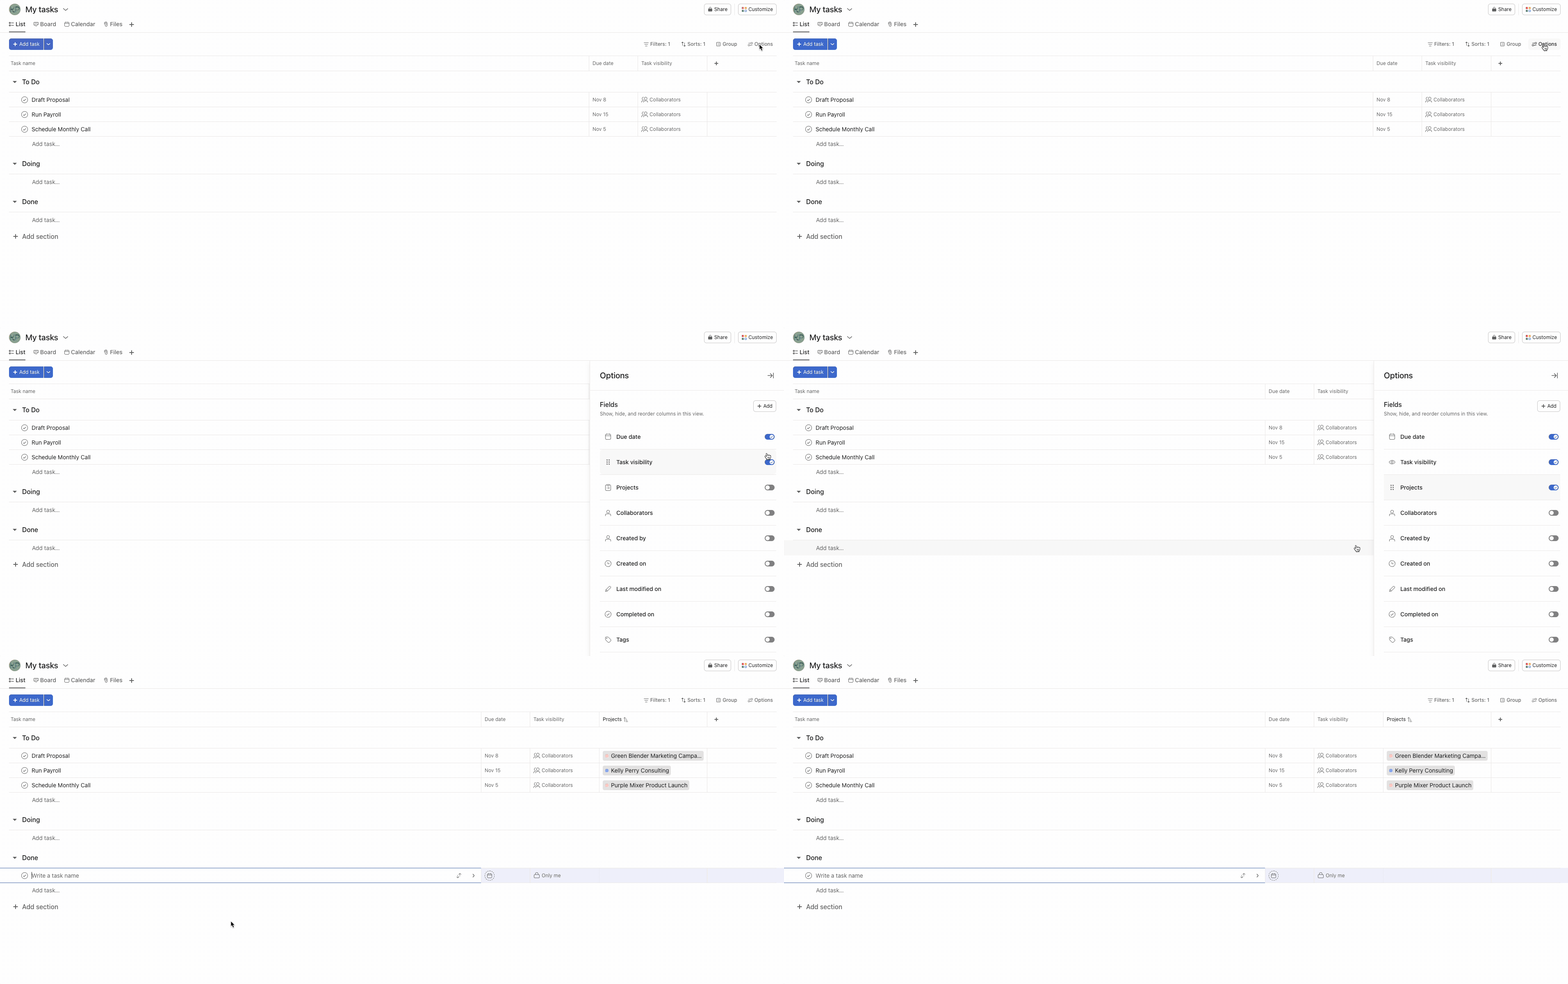
To start, let's make sure we’re getting the right insights from the “My Tasks” view. Head over to Options in the top-right corner and scroll down to explore all the available default fields. My top recommendation here is to toggle on Projects. This simple change allows you to see exactly which project each task belongs to, which can be extremely helpful for managing tasks across multiple projects.
Step 2: Group Tasks
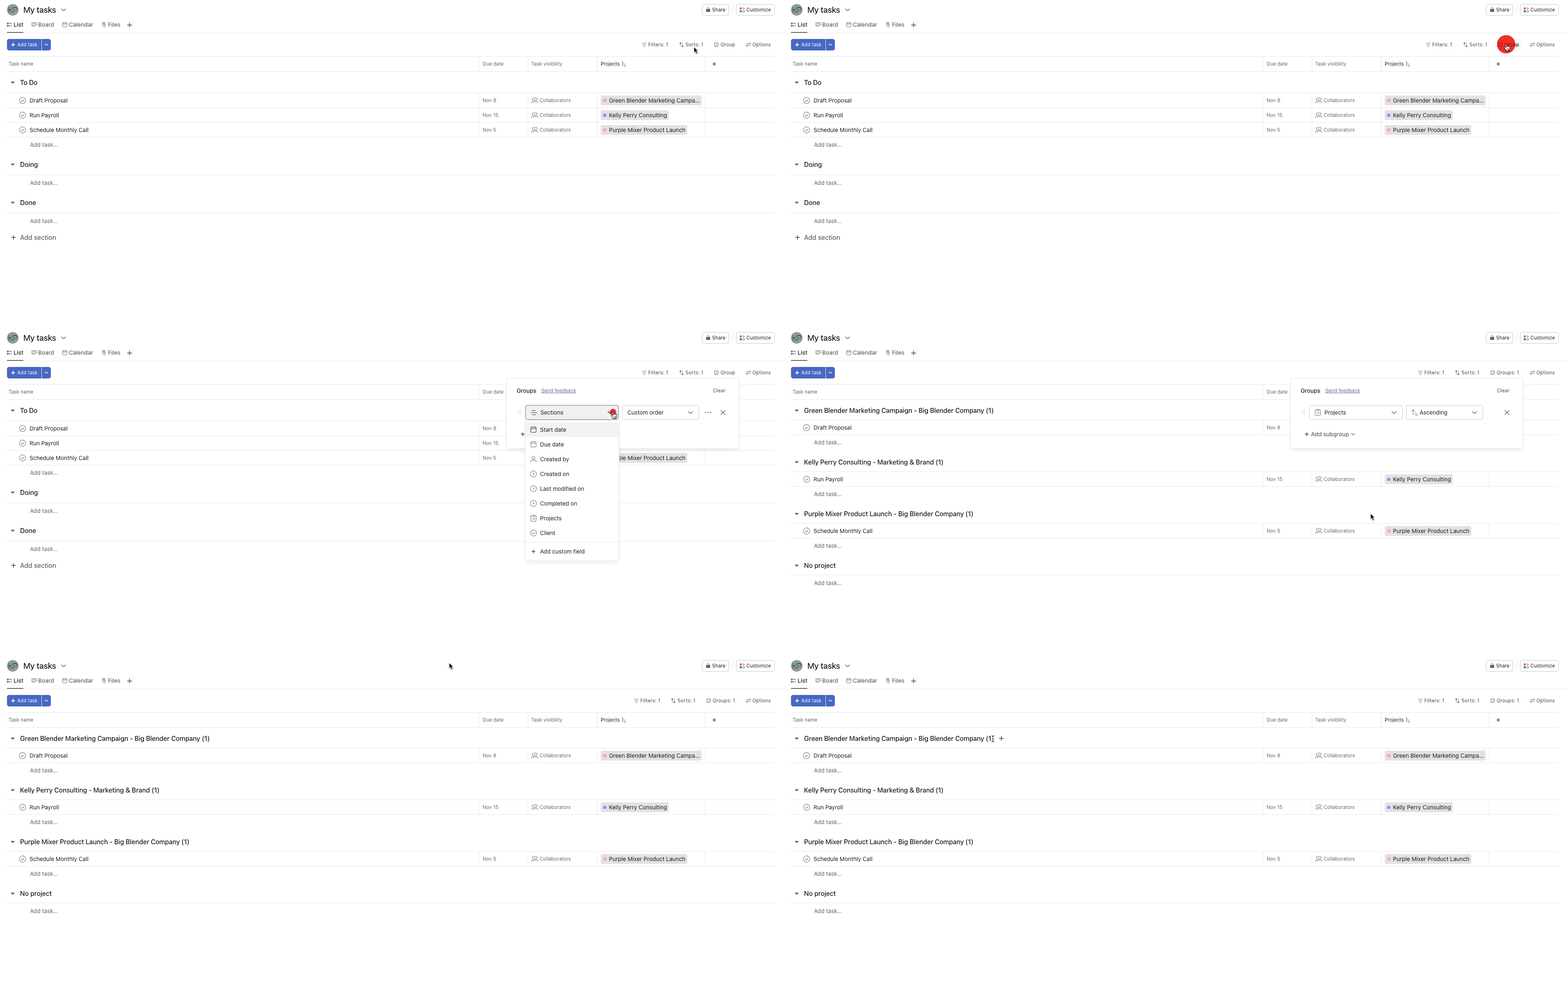
Once you’ve enabled the Projects field, you can organize tasks by project. To do this, click on Group and select Projects. This setup can get a bit confusing as it alters the headers and can be visually confusing, so let’s create a more customized approach in the next step.
Step 3: Adding Custom Fields
Upgrade your organization by adding relevant custom fields to organize your work. In this example, we will add a Client field that will enable us to Group our tasks by Client.
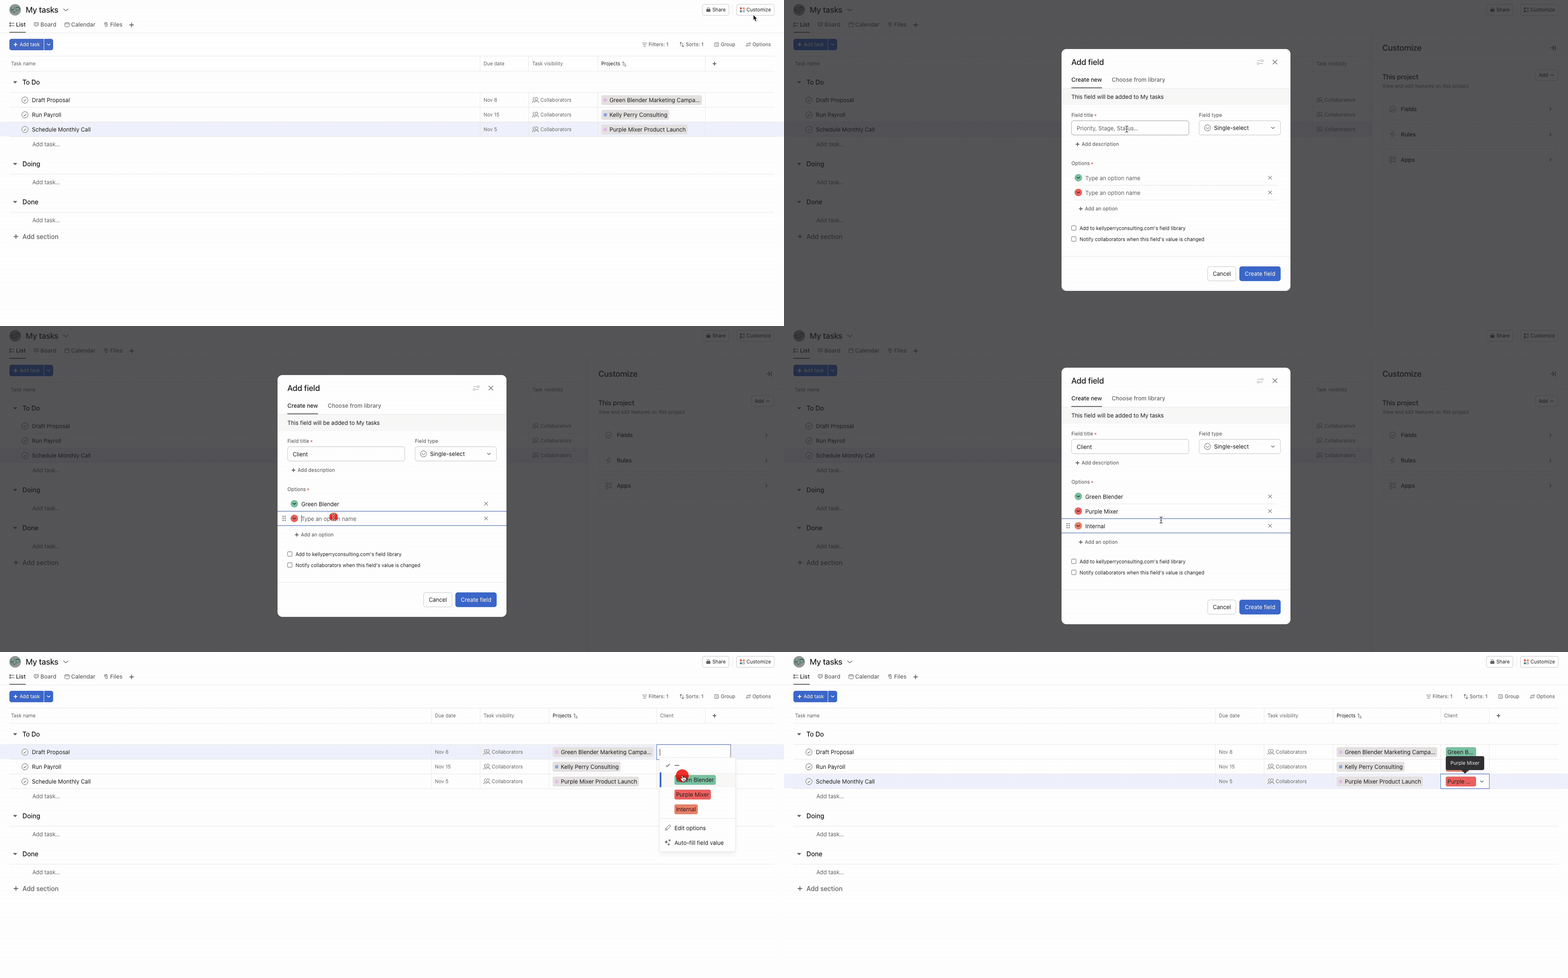
If you work with multiple clients or departments, grouping by project alone might not cut it. To add more specificity, let’s create a custom Client field. Navigate to Customize, then select Fields, click on Add, and choose Create New.
For this example, we’ll use a custom field labeled Client and populate it with names like Green Blender, Purple Mixer, and Internal. With this setup, you can categorize tasks based on each client, allowing you to quickly distinguish between tasks for various clients or internal work. To organize tasks by this new field, go to Group and select your new Custom Field.
Step 4: Automate Task Organization with Rules
Once your custom Client field is set up, manually updating it could become time-consuming. To streamline the process, you can establish a rule that assigns the correct Client field based on the project.
First, ensure the custom field is visible by adding it to your task library.
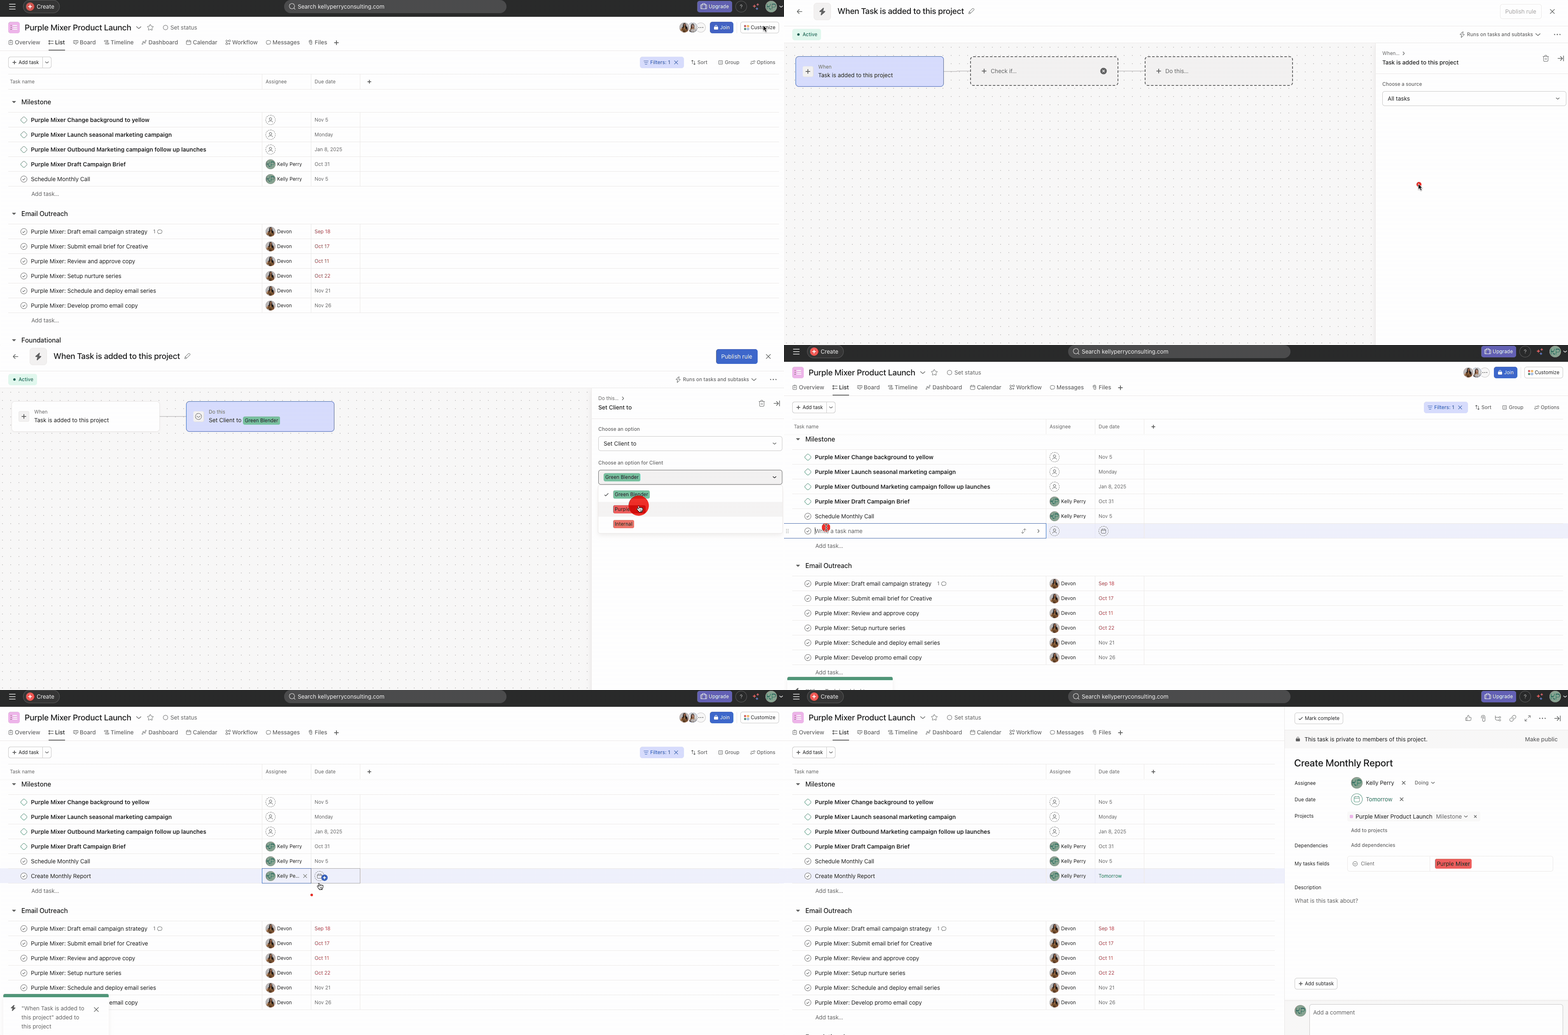
Then, within the client project setup (for example, Purple Mixer), go to Customize, select Rules, click on Add, and choose Create Custom Rule.
From here, select When > Task is added to this project and then skip the step for Check If. Within the Do this step, in this example we want to have the rule Set Client to Purple Mixer.
This rule will automatically apply the Client label based on the project each task comes from. This way, every task added to this project is automatically tagged, keeping your workspace organized with minimal effort.
Wrapping Up
With these tweaks, your Asana “My Tasks” view can become a powerful command center tailored to your specific needs. By customizing fields, grouping tasks meaningfully, and automating routine categorization, you’ll have a clear, actionable view of your priorities. Give these tips a try, and let Asana do the heavy lifting in managing your tasks.


